
How to Buy $ARIO with USDC on Ethereum
Step-by-step guide to acquiring $ARIO tokens using USDC on Ethereum, bridging through AOX, and swapping on Permaswap.
Ar.io is the First Permanent Cloud Network, driven by its native token, $ARIO. With a fixed supply of 1 billion tokens, $ARIO enables gateway staking, delegation, and Arweave Name System (ArNS) domain purchases—all within a censorship-resistant ecosystem.
This guide shows you how to acquire and use $ARIO starting with USDC on Ethereum, leveraging decentralized tools like AOX and Permaswap.
Step 1: Know the Players
These are the four key components in acquiring $ARIO for USDC:
-
USDC on Ethereum: A stablecoin pegged 1:1 to the U.S. dollar, USDC is widely available on Ethereum. It’s your starting asset, offering stability as you enter the ar.io ecosystem. You’ll need some in an Ethereum-compatible wallet (like MetaMask) to begin.
-
Wander (formerly ArConnect): The go-to wallet for Arweave and ar.io interactions. This browser extension securely holds your USDC, bridges assets, and manages $ARIO. Install it from its official site (https://wander.app).
-
AOX: aox.xyz is a decentralized cross-chain bridge connecting Ethereum to the AO Network. It wraps your USDC into wUSDC, making it usable on AO.
-
Permaswap: A DEX on the AO Network, Permaswap (permaswap.network) lets you swap wUSDC for $ARIO with low fees and full custody. It’s the final step to getting your hands on $ARIO.
These four players—USDC, Wander, AOX, and Permaswap—form your gateway to acquiring $ARIO.
Step 2: Set Up Your Wander Wallet
-
Install Wander from its official site and create a new wallet.
-
Securely back up your seed phrase—it’s your recovery key.
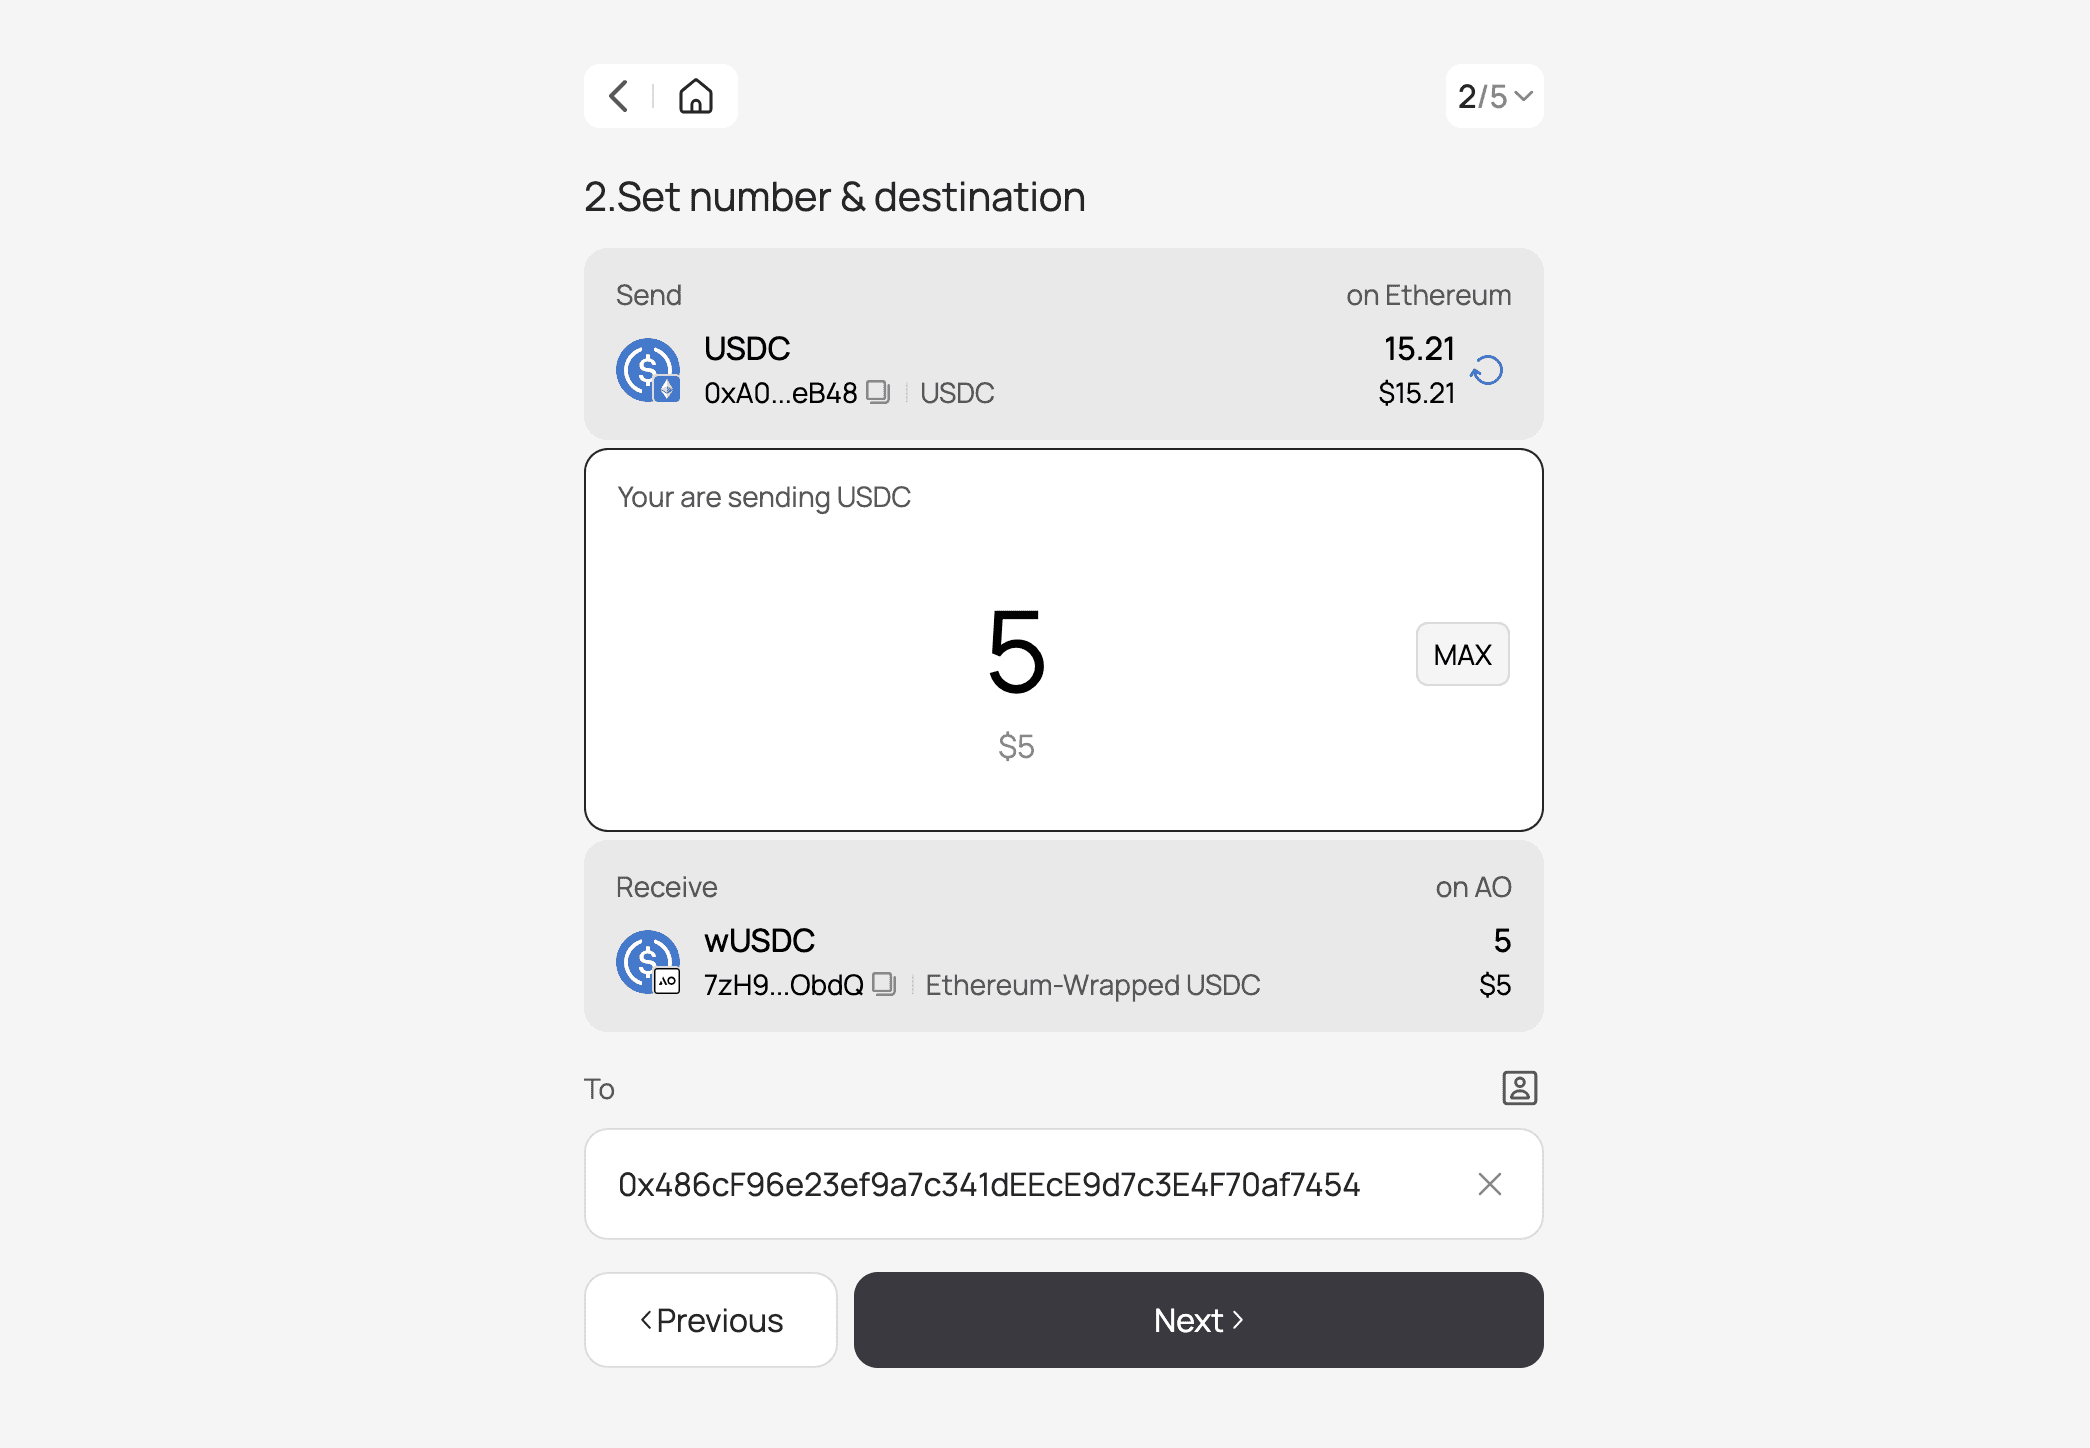
Step 3: Bridge USDC to wUSDC with AOX
-
Visit aox.xyz and connect your Ethereum wallet.
-
Select USDC on Ethereum as your source asset and your Wander wallet as the destination.
-
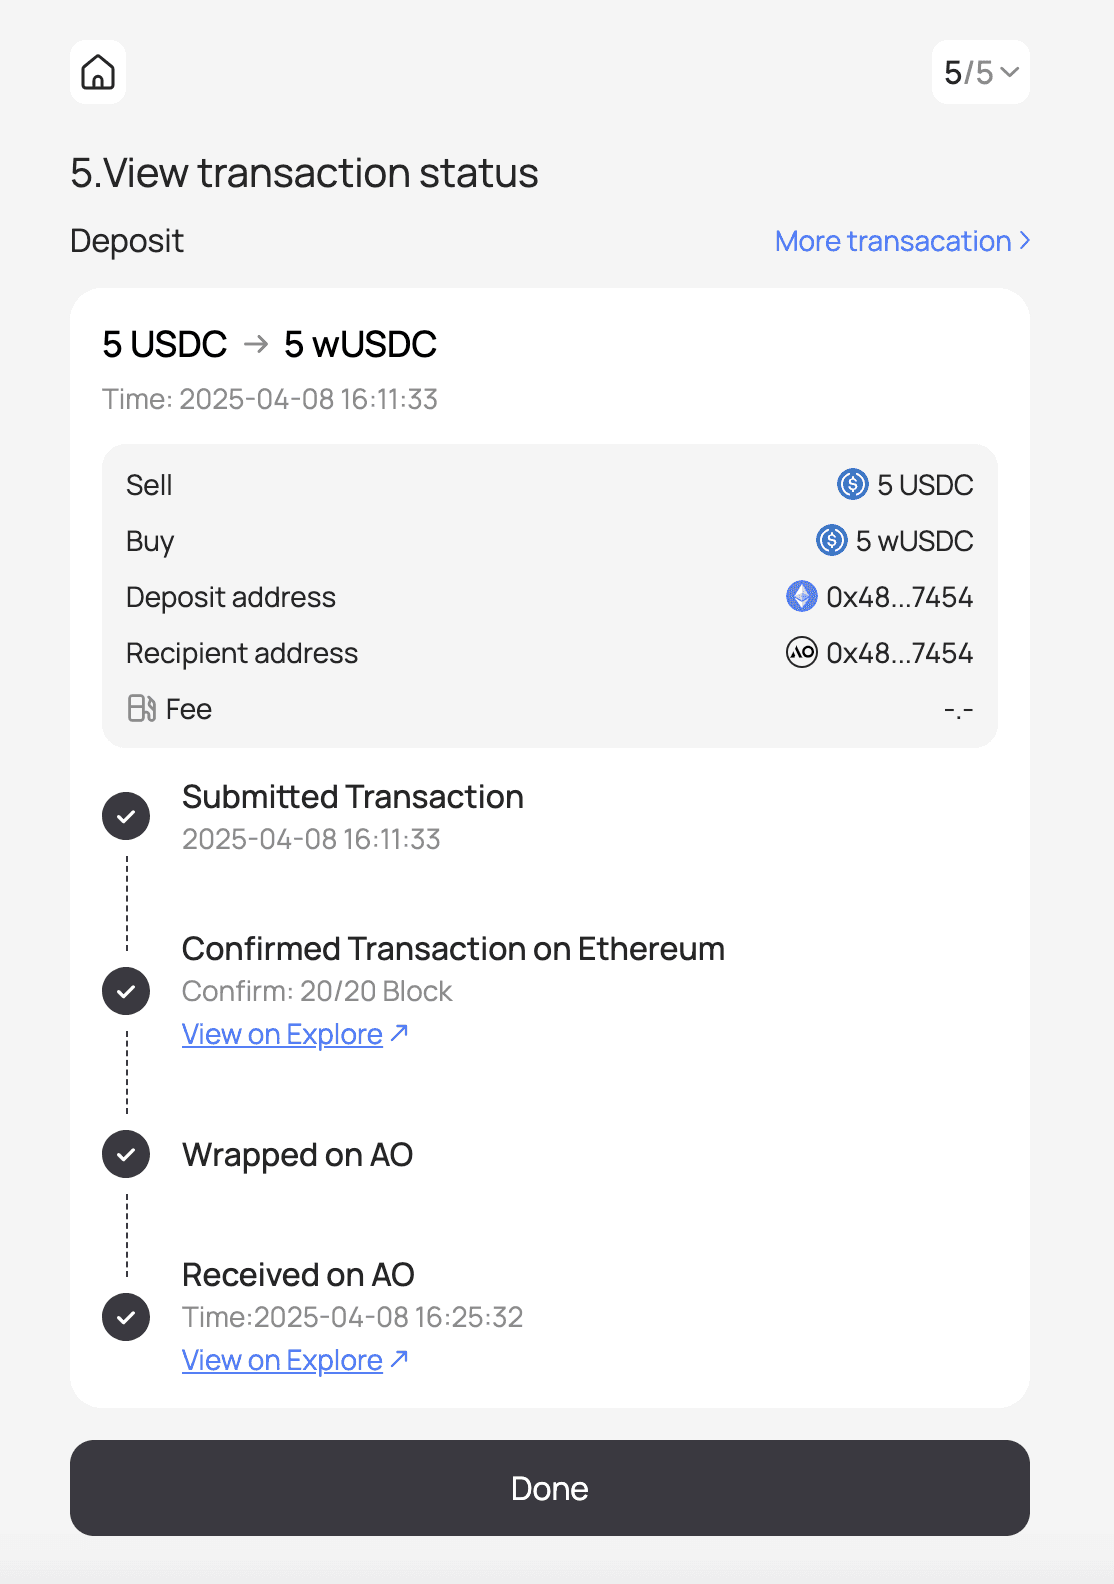
Enter the amount of USDC to bridge, review the transaction, and sign it with ETH gas.
-
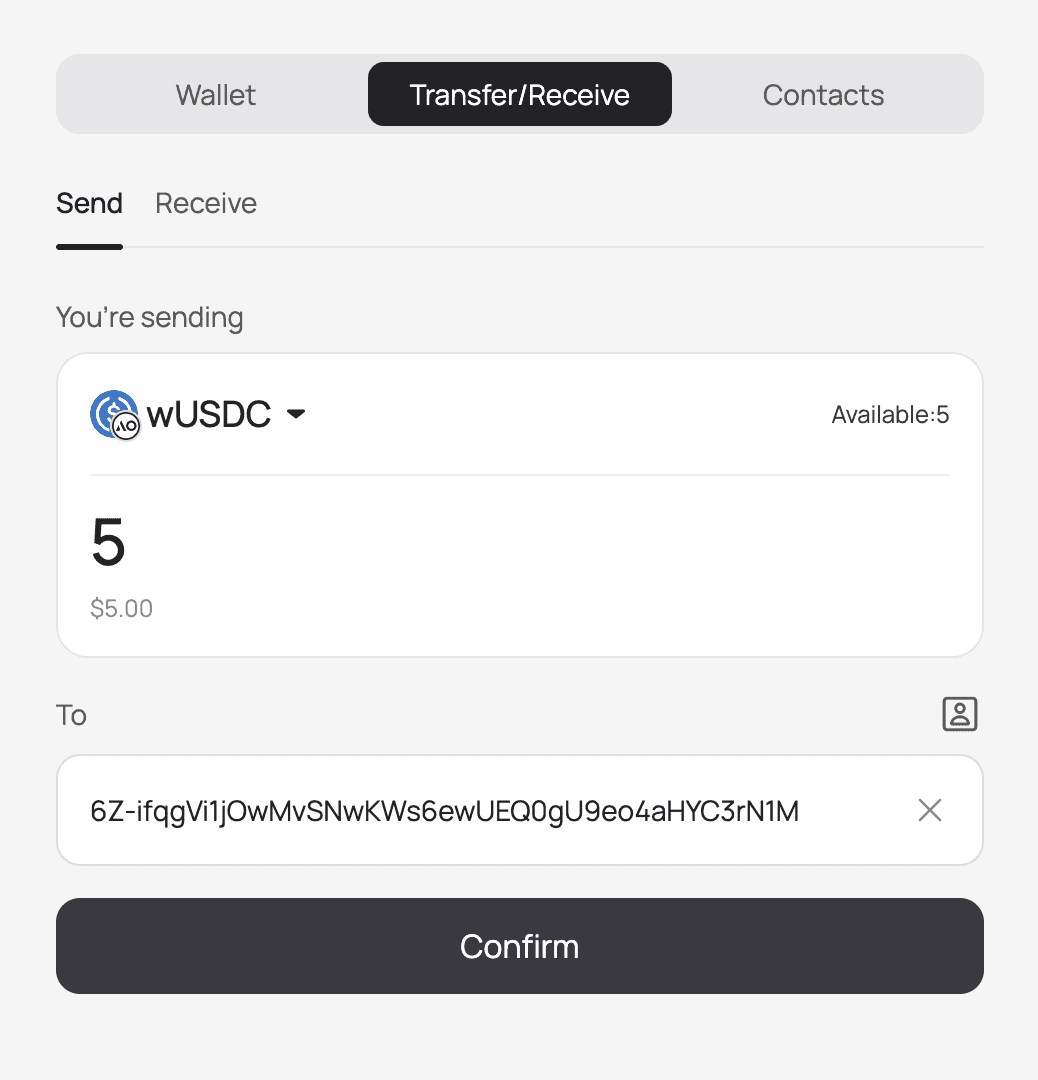
Wait ~30 minutes for the process to complete—wUSDC (wrapped USDC) will appear in your Wander wallet.
Double-check your wallet address when transferring—blockchain transactions are irreversable!
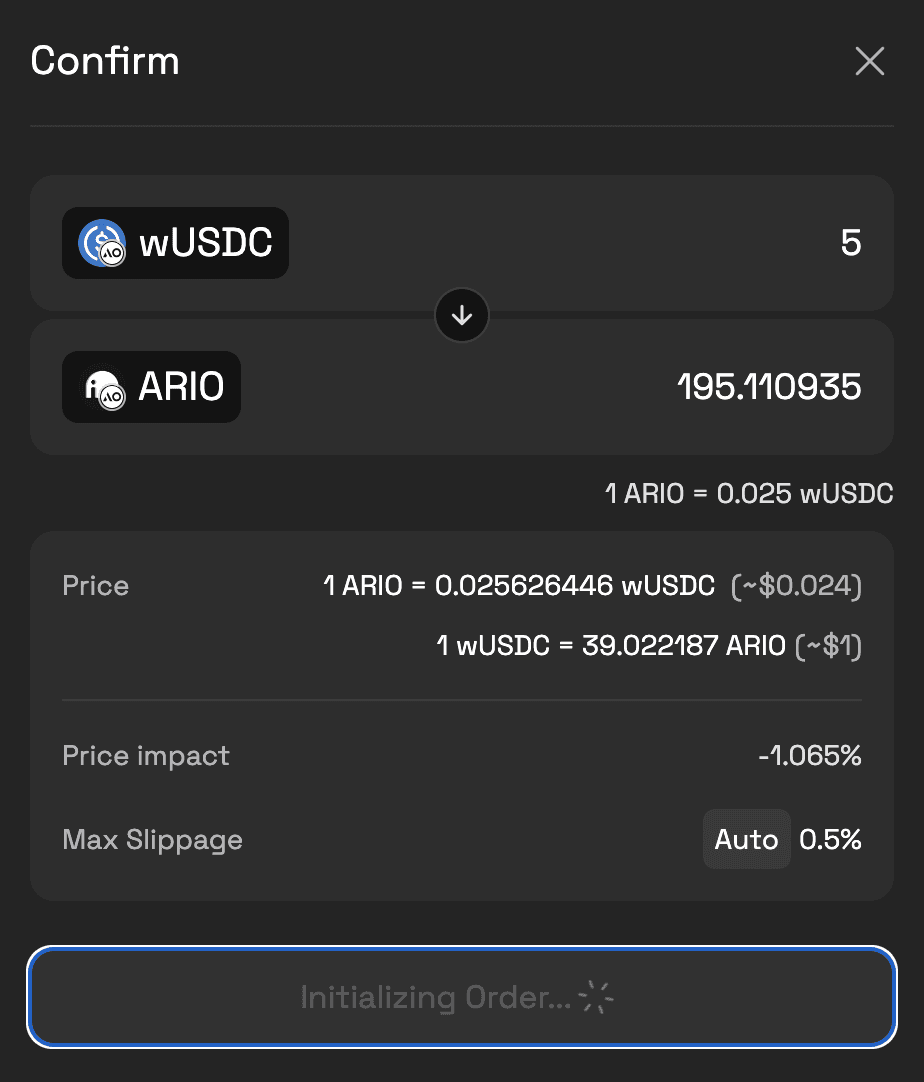
Step 4: Swap wUSDC for $ARIO on Permaswap
With wUSDC in your wallet, head to Permaswap to get $ARIO:
-
Go to permaswap.network and connect your Wander wallet.
-
Select the $ARIO/wUSDC trading pair.
-
Input the amount of wUSDC to swap and confirm the transaction.
-
$ARIO lands in your wallet, fully under your control.
Step 5: Put $ARIO to Use
Now that you’ve got $ARIO, put it to work:
-
Stake as a Gateway Operator: Run a gateway, stake 10,000 $ARIO (see our docs for getting started), and earn rewards everyday as a reliable node. Get started in the Network Portal.
-
Delegate to a Gateway: Delegating $ARIO to operators is a great way to share in the rewards of gateways without running one yourself. Learn more about delegated staking.
-
Secure an ArNS Name: Use $ARIO to buy or lease a permanent domain at arns.ar.io, tying it to permaweb content. Learn more about the Arweave Name System.
Did you find this guide useful? Let us know on X and welcome to the First Permanent Cloud Network!